Introduction
As per 30 May 2022, Gmail will no longer allow 3rd party apps or devices to sign in with username/password only.
You will then no longer be able to switch the Allow less secure apps setting to on.
As a result of this, the Infradox website will no longer be able to log on to your Gmail or Google Workspace account to send out email from the website.
To circumvent this you need to change the email configuration of your Infradox website to use the Google Relay SMTP gateway instead of your standard Google mail account.
This article explains how this works and what you need to change in your Infradox website and in your Google account.
Raised security levels
As you may be well aware, the number of digital threats is growing day by day and email is amongst the services that are most susceptible to hacking.
To counteract this, Google is now imposing 2 step verification and oAuth2 login protocol to verify the identity of the user that logs on to a Gmail or Google Workspace account.
This requires interaction with the user logging on and that’s something that isn’t possible if it’s the webserver that logs in.
To work around this, you will need to configure your Google account to allow the Infradox website to log on to the Google Relay SMTP server to send out email from the website.
What’s the difference?
The difference between logon to a Gmail or Google Workspace account versus the Google Relay SMTP server is that the former gives you access to the entire mail account (Inbox, Sent mail, etc..) and the latter only gives you (or in this case, the webserver) access to the server mechanism that sends out email only, without access to anything else that’s in the mail account.
What do I need to do?
There are 2 things you need to do:
- Authorize the Infradox website to send mail for your domain via the Google Relay SMTP server
- Configure your Infradox website to use the Google Relay SMTP server
1. Authorize Infradox website
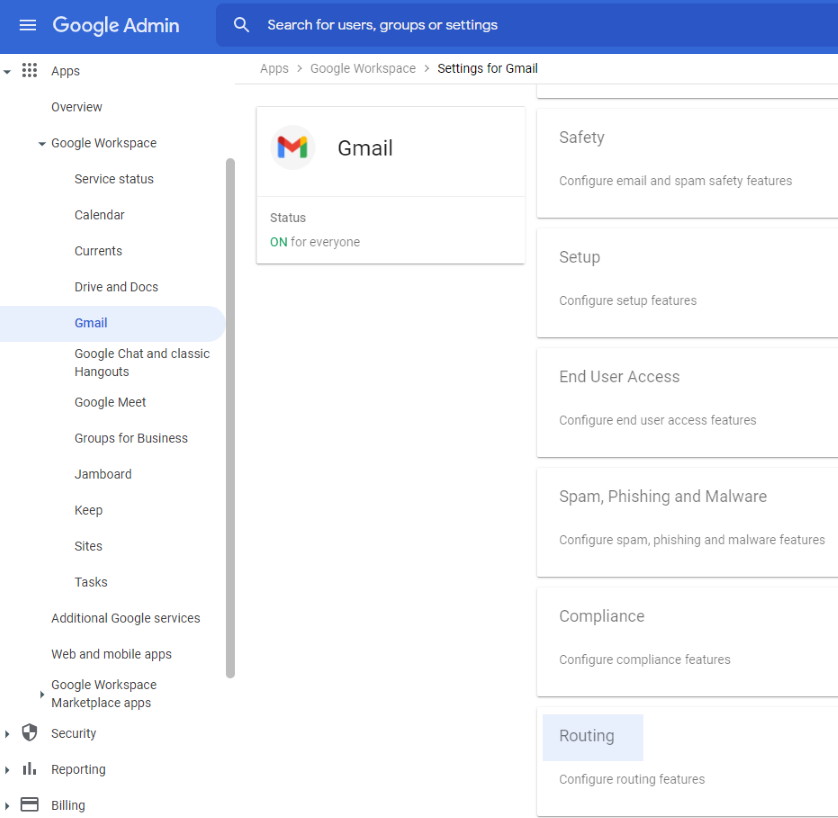
Log on to your Google Admin Dashboard
Navigate to Apps -> Gmail and in the details pane on the right, scroll all the way down and click on Routing:
This will present you with the mail routing settings where you can add a rule to allow the Infradox website to send out email.
In this view, scroll down to SMTP relay service:
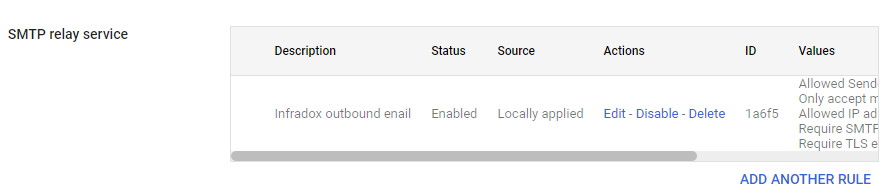
If there are no rules yet, you can click on the CONFIGURE link, otherwise you can click on the ADD ANOTHER RULE link.
Add the following details on the form for the new rule:
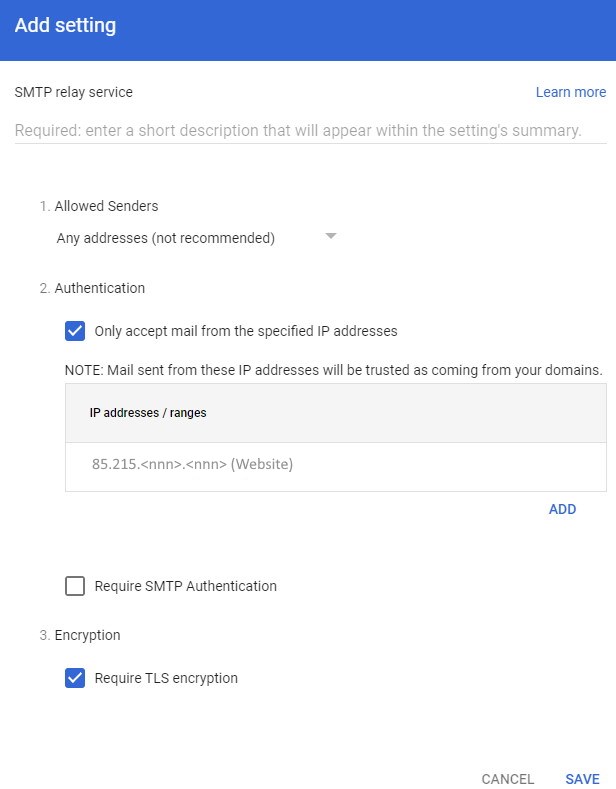
The exact IP address that you need to put in here is the IP address of your website, which will start with 85.215 and then 2 other numbers, e.g. 85.215.211.166.
So the <nnn>.<nnn> number placeholders in the example above need to be replace with the last 2 IP address numbers of your website.
If you don’t know how to find out what the IP address of your server is, then just ask us and we’ll provide you with the correct IP address.
You can put your own description in, e.g. Website
It is safe to put in the Any address (not recommended) setting, because you’ll also add an IP address restriction that will limit this rule to the Infradox server only.
If you leave the Require SMTP Authentication checkbox unchecked, then you won’t need to keep the login details of your Gmail account in synchronization with the configured details in your Infradox website. This will ensure that website emails can be sent out when you change your password in your Gmail account.
If you enable this option, then you’ll need to make sure that you keep the login details on your Infradox website in sync with your Gmail login credentials.
2. Configure Infradox website
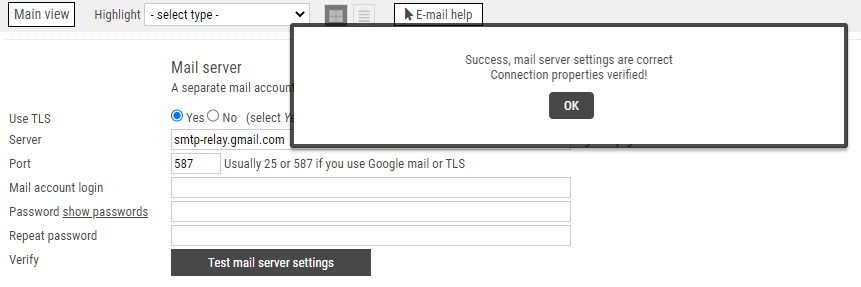
To configure your Infradox website to use the Gmail Relay SMTP server, navigate to Site configuration -> E-mail configuration and put the following values in:
Use TLS: Yes
Server: smtp-relay.gmail.com
Port: 587
If you enabled the Require SMTP Authentication setting in the SMTP relay service rule in your Gmail account, then you’ll also need to enter the login details here and keep this in sync with your Gmail account.

To verify that all settings are correct, you should click the Test mail server settings button and you should get this message:.
If all is correct, then save the configuration with the Save button at the bottom of the page.