Introduction
Setting up additional 3rd party cloud storage that has a copy of all your files serves multiple purposes:
- Offsite backup
All files have an additional copy outside the Infradox datacentre and outside your own premises. - Independent access to your files in case of website disruptions
If the cloud server website isn’t available for whichever reason and you can’t retrieve the files from the Infradox datacentre because that goes via the website, you can still access the files directly at the cloud storage provider. - Extra redundancy in case of datacentre outages
If the Infradox datacentre storage area network would be inaccessible for whichever reason, the cloud server that runs your website can still access your files on the cloud storage location and website uploading / downloading / distributing files would keep functioning without anyone even noticing. - Better contingency planning
You’d have access to the files always without depending on anyone. So in terms of contingency planning, it gives you the most flexibility.
To prepare for this you’ll need to contract a cloud storage provider where you want to implement this. Currently the following cloud storage providers are supported by Infradox:
Infradox recommends Backblaze as this delivers the same services and quality as the others, but at a much lower price, but this of course, is your call.
Amazon S3
To enable cloud storage and retrieval of high resolution files using your Amazon S3 account, we need to have the following details:
Bucket name
Region
Access key
Secret access key
To configure a bucket as an additional storage endpoint for your Infradox website, you need to do the following:
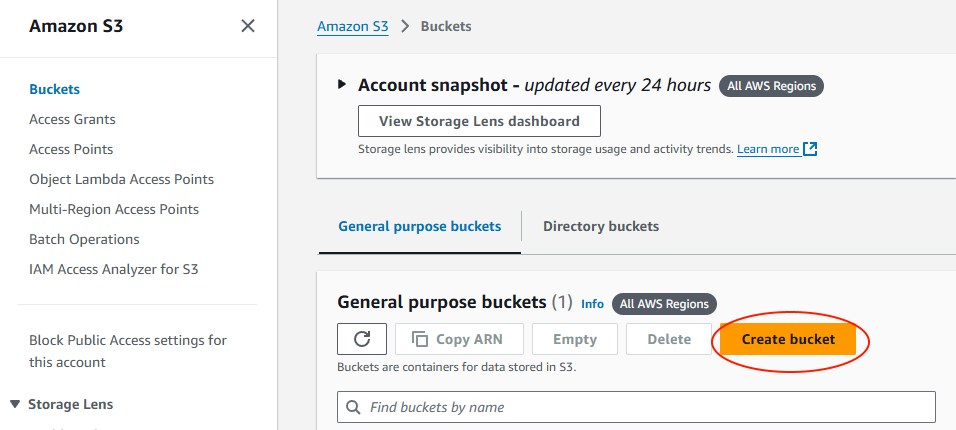
Create a new bucket
Give the new bucket the name infradox.
Also make a note of the region where the bucket is created as this is one of the details the website needs to know:
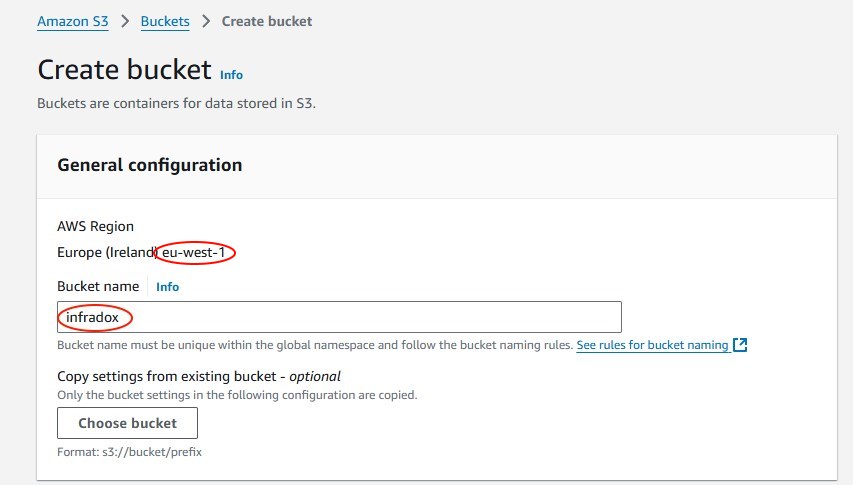
You can leave the other properties at the default settings.
To allow the Infradox website and upload workflow access to this bucket, you need to create a separate user and access key.
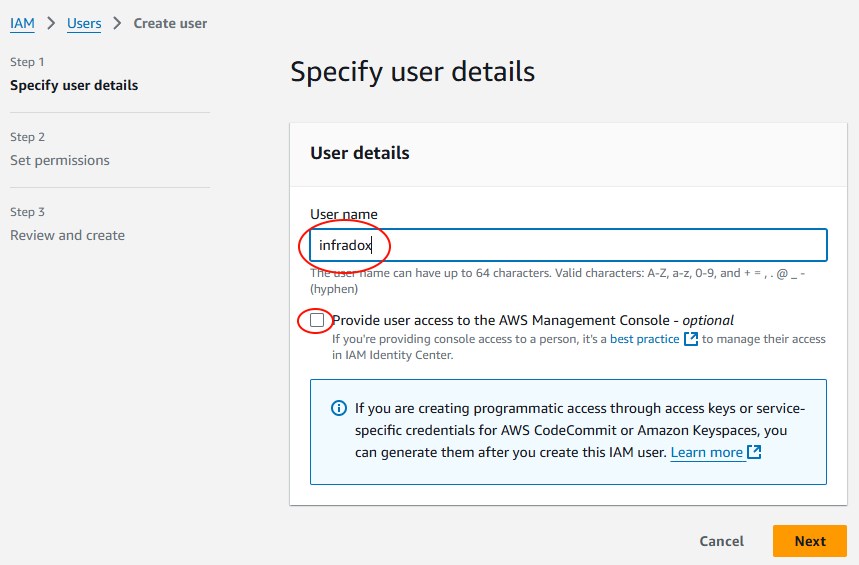
You do this by going to the Identity and Access Management (IAM) console, select users and click Create user:

Input infradox as the user name and do NOT tick the checkbox Provide user access to the AWS Management Console:
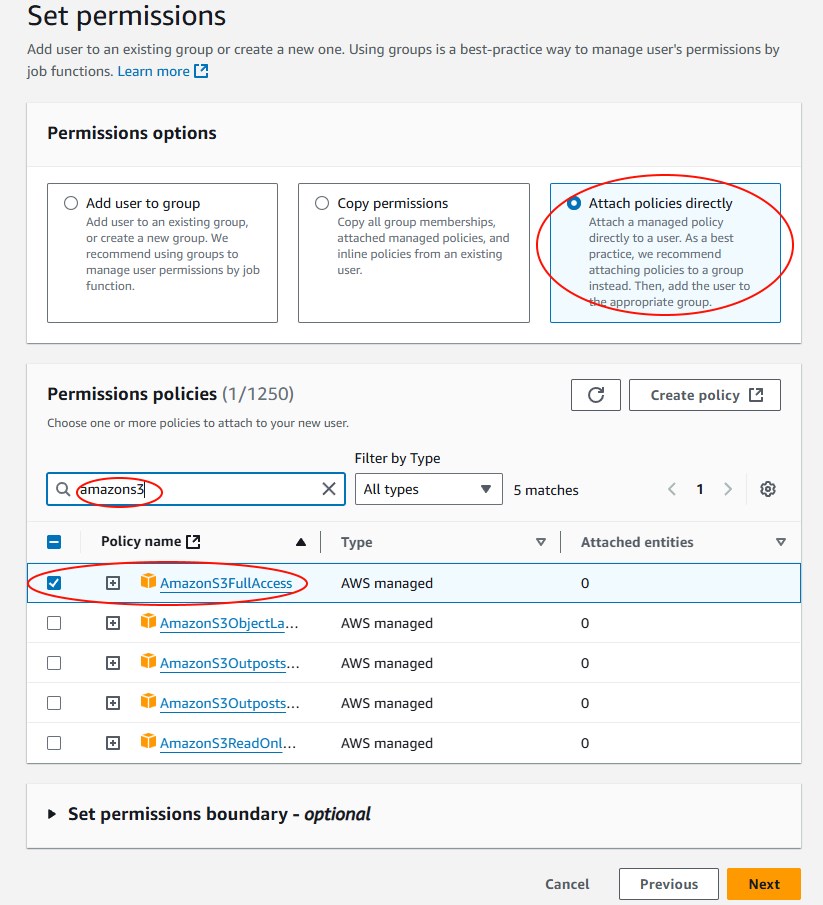
Go to the next step and assign permissions via a directly attached policy:
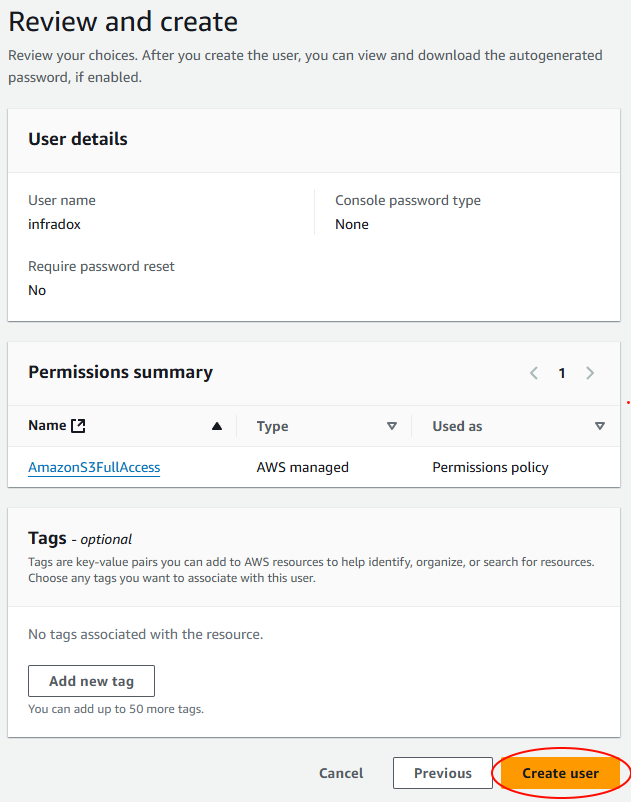
Click next to go to the review and create screen and click Create user to finish:
The next thing to do is to create the application access key.
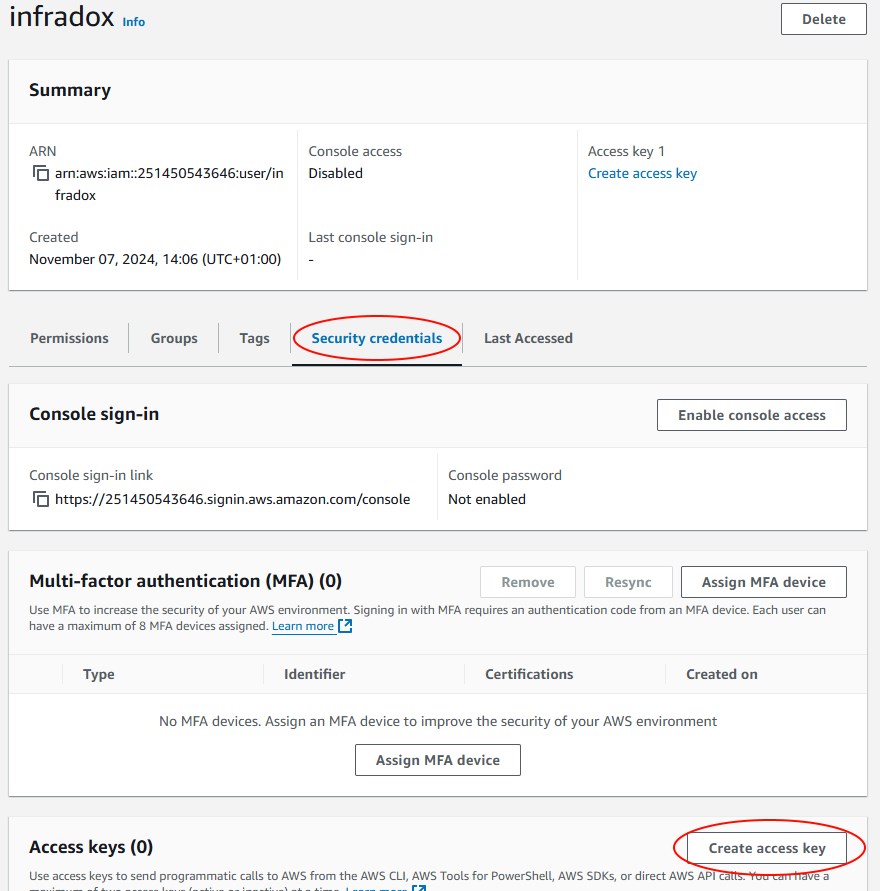
Go to users and select the user you just created. In the details pane, go to the Security credentials tab.
Scroll down to the Access keys section and click Create access key:
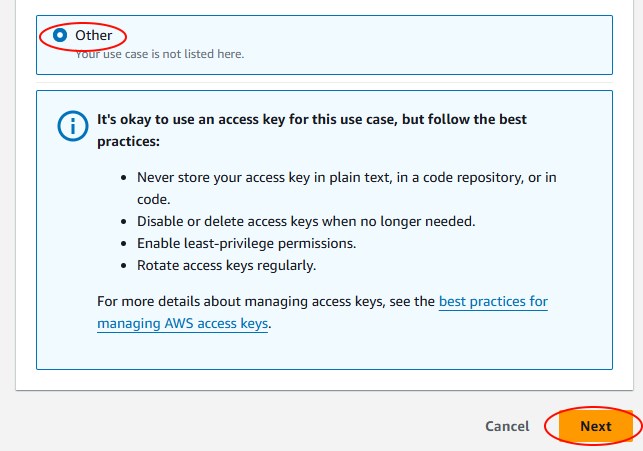
Select Other in as the use case and click Next:
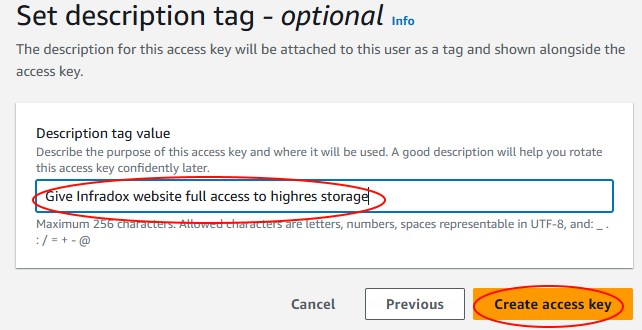
Add a description to the key so you know what this is for and click Create access key:
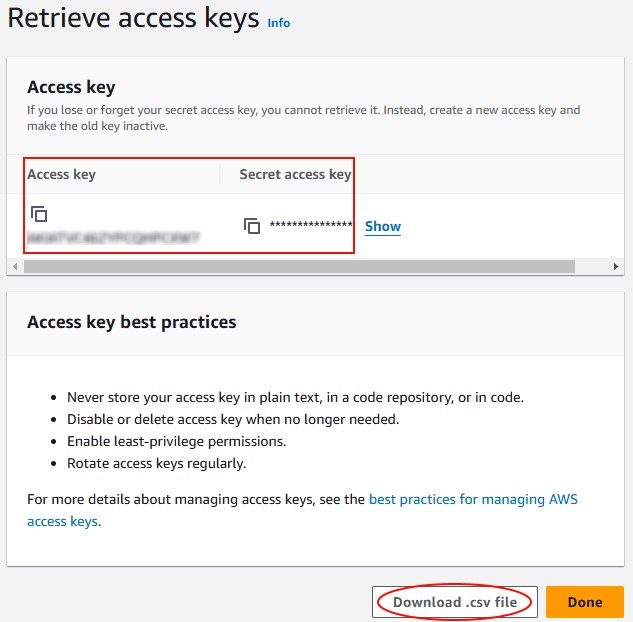
After you’ve created the access key, you can export the credentials (Access key and Secret access key) by clicking Download .csv file:
Backblaze B2
To enable cloud storage and retrieval of high resolution files using your Backblaze account, we need to have the following details:
Bucket name
Access key
Secret access key
To configure a bucket as an additional storage endpoint for your Infradox website, you need to do the following:
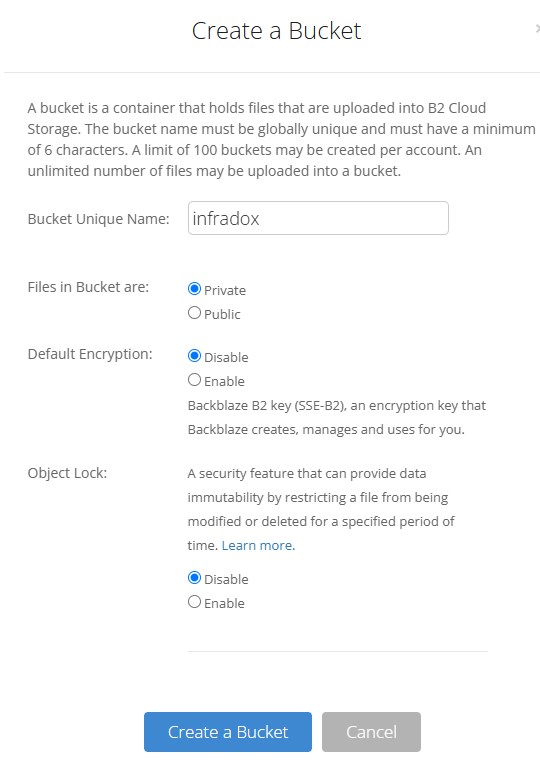
Go to Buckets and click on Create a Bucket:

Name the bucket infradox and leave the other properties to their default values:
After creating the bucket, you need to create an application key.
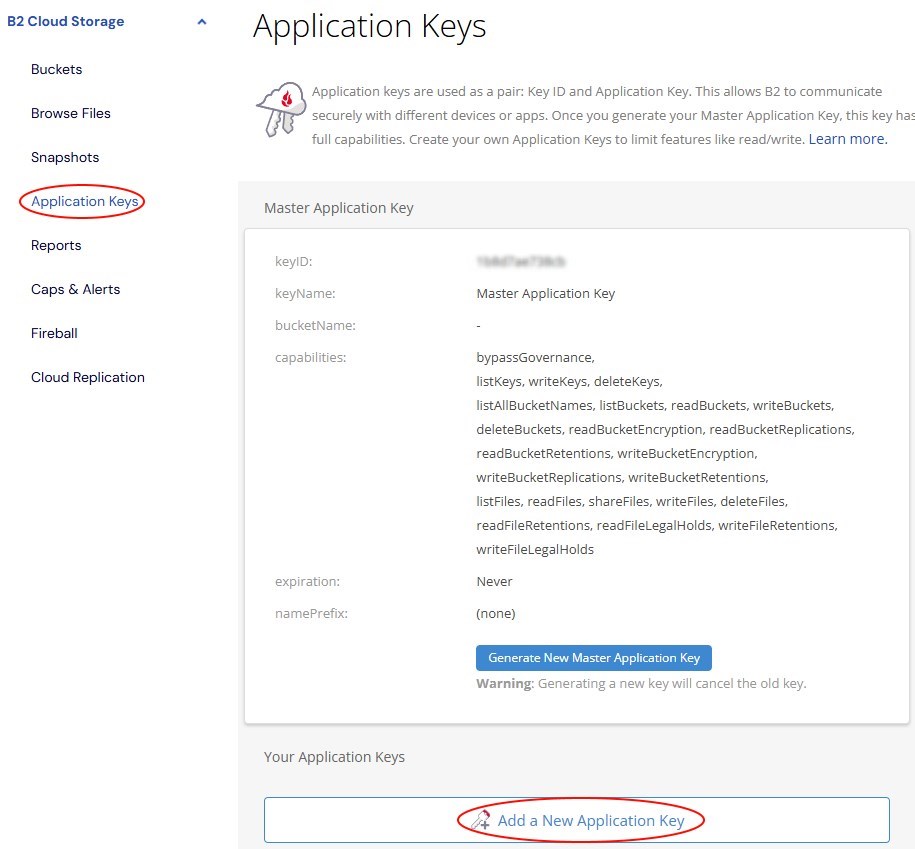
Go to Application Keys and click on Create a New Application Key:
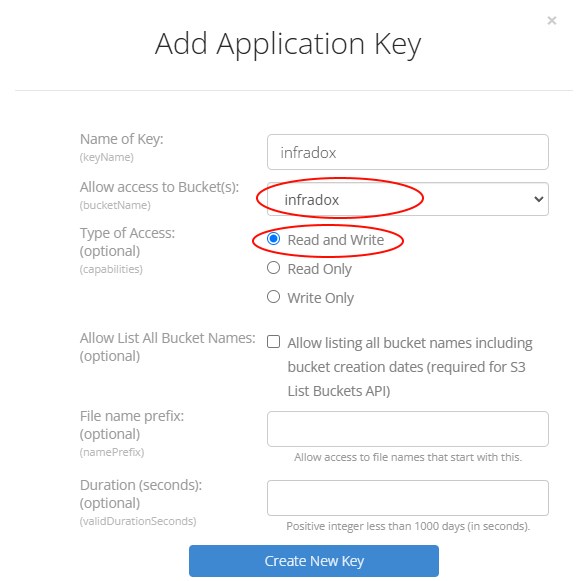
Name the key infradox and limit its access to the infradox bucket. Set the Type of Access to Read and Write. Leave the other fields empty:
After clicking Create New Key, it will be shown in a rectangle with a blue background.
Please note, that the applicationKey part will only be shown once, so make sure you copy it by clicking Copy to Clipboard and save the key together with the keyID.

Google Cloud Storage
For Google Cloud storage you need to do the following in the Google Cloud console:
-
Create a Service Account in IAM & Admin and create a Key
(the JSON file will be saved to your computer; we will need this file). -
Create a bucket in Cloud Storage as an endpoint for Infradox storage
-
Assign the created Service Account permissions with read/write access to the created bucket
Microsoft Azure Cloud Storage
-
For Microsoft Azure storage you need to do the following in the Azure Portal:
-
Create a resource of type Storage account
-
Create a new Container in Data storage -> Containers
-
Create an Access key in Security + networking -> Access keys
(we will need this key)

