This article describes the administrator’s dashboard, toolbar – how to customise and how to use the quick find function for user accounts. Page last updated on 21 October 2022 for version 32.19.
Recommended reading
Using your dashboard
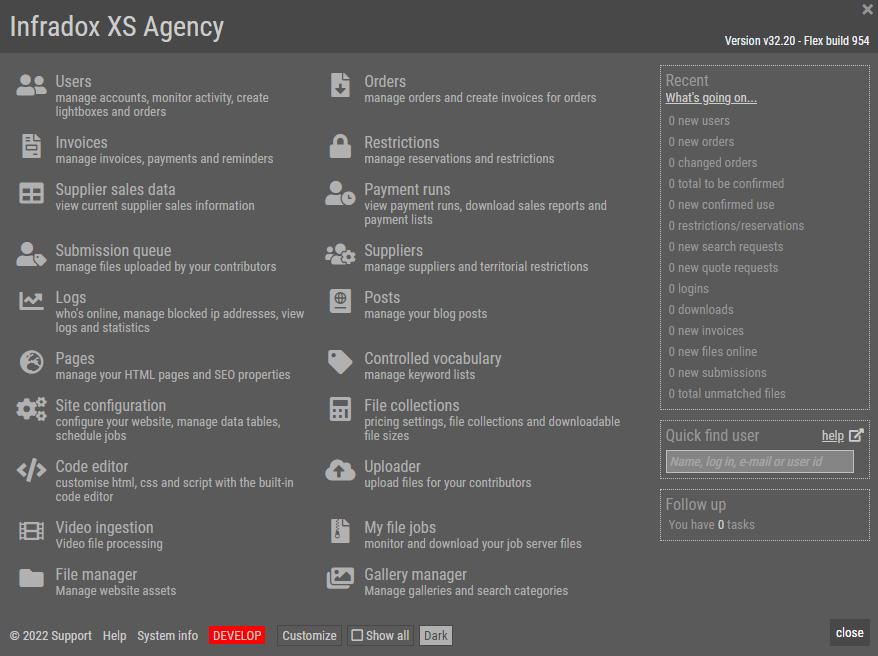
When you are logged in with an account with administrator or staff member permissions, you can access the dashboard either by selecting it in the My account menu, or – with the admin toolbar enabled – you can click Dashboard in the toolbar.
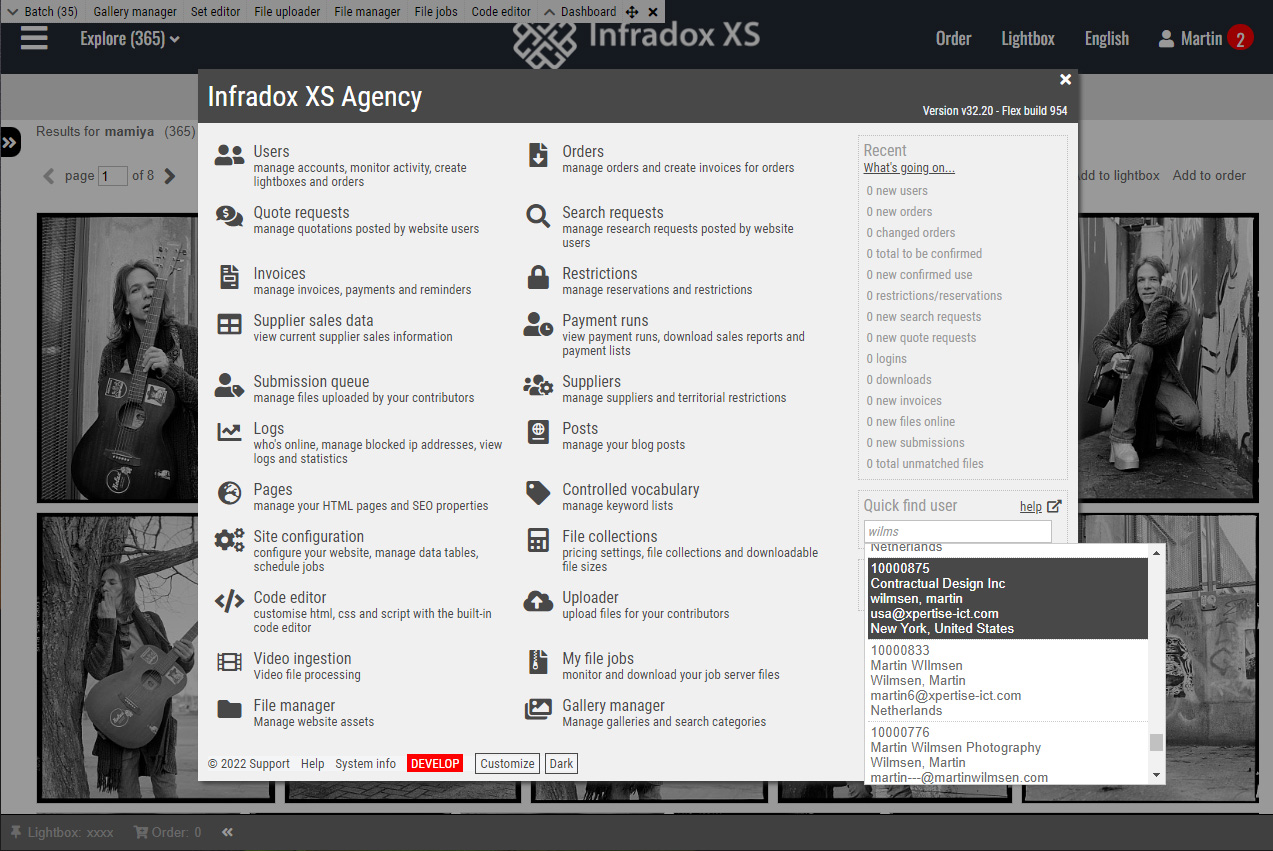
The dashboard functions as a menu for all your back office functions, it provides you with information about website activity (including quick links for details), it offers access to your tasks and it lets you quickly find a user account (see screenshot above).
Admin functions and permissions
The items that show on your dashboard depend on the version of the Infradox platform and the enabled modules. Furthermore, the dashboard shows only items for which you’ve been granted permissions. To grant admin permissions on an account, log in with the Super admin account and open the user account dialog. Click on the ‘Permissions’ tab and then click on the ‘Grant admin permissions’ button. After the user list has refreshed, open the user account dialog again and click on the ‘Admin’ tab. You can now configure the user’s permissions. Certain functions may require an optional module, for example Invoice management, Submission queue management and Supplier payments.
PIN codes
The Super admin account will require you to log in twice. First with your log in and password and then again with your PIN code. A PIN code is optional – but recommended – for all other admin accounts. You can’t change the PIN codes online, this is configured on the server for you by your support team. Creating a support ticket to enabled or disable PIN codes and/or to request changes to your website’s PIN codes.
Password reset requests
The admin passwords are more sensitive than normal user passwords. Therefor it is not possible to request a password reset link for admin accounts on the client facing pages. It is however possible to send a password reset link from the user properties dialog.
Customising your dashboard and toolbar
Each staff member can switch between “Light” and “Dark” mode with the button at the bottom of your dashboard. These settings are personal and don’t affect other staff members. The screenshot below shows the dashboard in Dark mode. This also affects all backoffice pages (you can switch modes any time, also when viewing backoffice pages).
To customise your personal dashboard and toolbar, click on the button at the bottom of your dashboard. This will switch the dashboard to editing mode. See screenshot below (in Light mode).

You can rearrange the menu items that are available to you (which depends on your permissions and optional modules) with drag and drop. To remove items from your dashboard, click on the bin icon. You can remove infrequently used menu items. After you’ve saved your dashboard with items removed, you will still be able to access these items – a “Show all” button will appear at the bottom of your dashboard that you can click to hide/show items.
The top of the dashboard will show the items that appear in your toolbar. Editing your toolbar works the same way as editing your dashboard; to remove items click the bin icon, to rearrange the order of display you can use drag and drop. If you dont’ want a dropdown menu in your toolbar, untick the checkbox in the “Pulldown” toolbar button.
If you want to restore the dashboard or toolbar, click on the Reset buttons, then save your changes.
Using the “Quick find” function for user accounts.
You can enter a contact name, organisation name, user id, log in or e-mail address to quickly get a list of suggestions. Click on any of the suggested user accounts to open the user account properties dialog.
By default, the quick find function searches for accounts containing what you have entered. If you are not sure of spelling, then start your search with a question mark. This will use a “sounds like” algorithm. For example ?willemsen will find willemsen as well as wilmsen and any other similar sounding name.
For more specific results, enter a comma between the contact’s first and last name, or the contact’s last name and a company name. E.g. wilmsen, xpertise or wilmsen,martin. You can also start your search value with a question mark for a “sounds like” search, even if you use a comma (as described above). E.g. ?willemsen,xpertis will find a user account with last name Wilmsen and company name Xpertise.
Viewing a user account from the dashboard
Click on a name in the list of user accounts to open the user properties dialog. The user dialog lets you change the user details, and it also gives access to all information re the user. Click on the Activity tab to see searches, log information, what’s in the user’s cart, what’s in the user’s lightboxes, which files were previewed and so on. There’s also a dropdown box that takes you to all of the user’s orders, invoices, quote requests, search requests and restrictions/reservations.
Click on the Contact log tab so view all logged contact entries, such as information about phone calls, e-mails and so on. You can also add new entries and create tasks (entries requiring follow up) here.
If you want to work with files in the user’s lightboxes or cart, then go to user management. At the bottom of the user properties dialog there’s a link to go to the user management page with the user account already loaded. There you’ll find functions to add files to the user’s lightbox, to copy lightboxes between accounts, to copy files from the cart, to create orders into the user’s account and much more.
Displaying your tasks in the dashboard
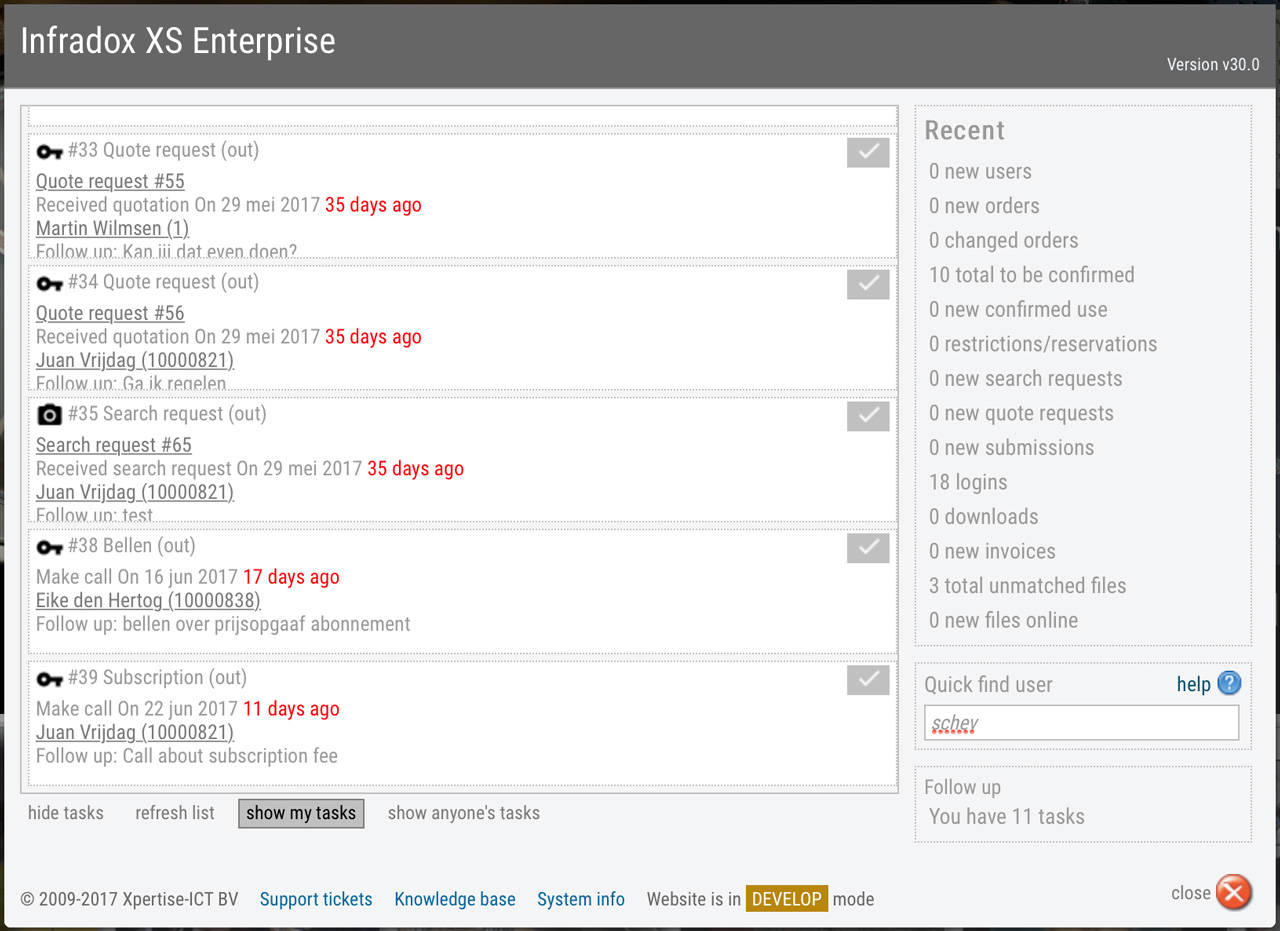
As described above, you can view all logged contact info and tasks regarding a specific user account in the user properties dialog. If there are tasks that are assigned to you, you’ll see this at the bottom of the dashboard. Click on the link to display all tasks (screenshot below). Tasks are listed in the order of which follow up was scheduled. To quickly mark a task as done, click on the V icon on the right of a task. To view the task details, click on a task in the list.
Recent website activity
The box on the right hand side of the dashboard show activity in the last 24 hours. E.g. new orders created, new users registered and so on. You can click on any of the links to go to the management page that lists the recent activity.