The Infradox system supports all common standard types of file restrictions.
Recommended reading
- Uploading model/property release documents
- Configuring restrictions on supplier files
- Data processing rules
- File use confirmation
About file restrictions
You can hide files from your client facing pages (such files will not appear in search results), you can block delivery of files, you can create non-blocking restrictions, you can block files for agents, uses other than editorial, syndication, API access and so on. All by simply ticking the relevant checkboxes, either for a single file or in batch. Note that restrictions can be applied automatically at the ingestion stage as well – by means of bulk applying properties configured for suppliers and groups and by use of Data processing rules.
You can create file restrictions that you can link to user accounts and/or orders. Such restrictions have a number of settings, i.e.
- a start and and end date (note that XS also has functions for File Use confirmation),
- a public and a private (visible for administrators only) description,
- whether or not the restrictions shows on preview and/or order pages,
- whether or not the file can still be added to carts while the restriction is active,
- whether or not the file can still be added to carts, but delivery of that file is blocked until an administrator approves delivery of that file,
- a user account (optional),
- an order (optional),
- whether or not the restriction/reservation appears on the user’s page on the client facing website – if linked to a user account.
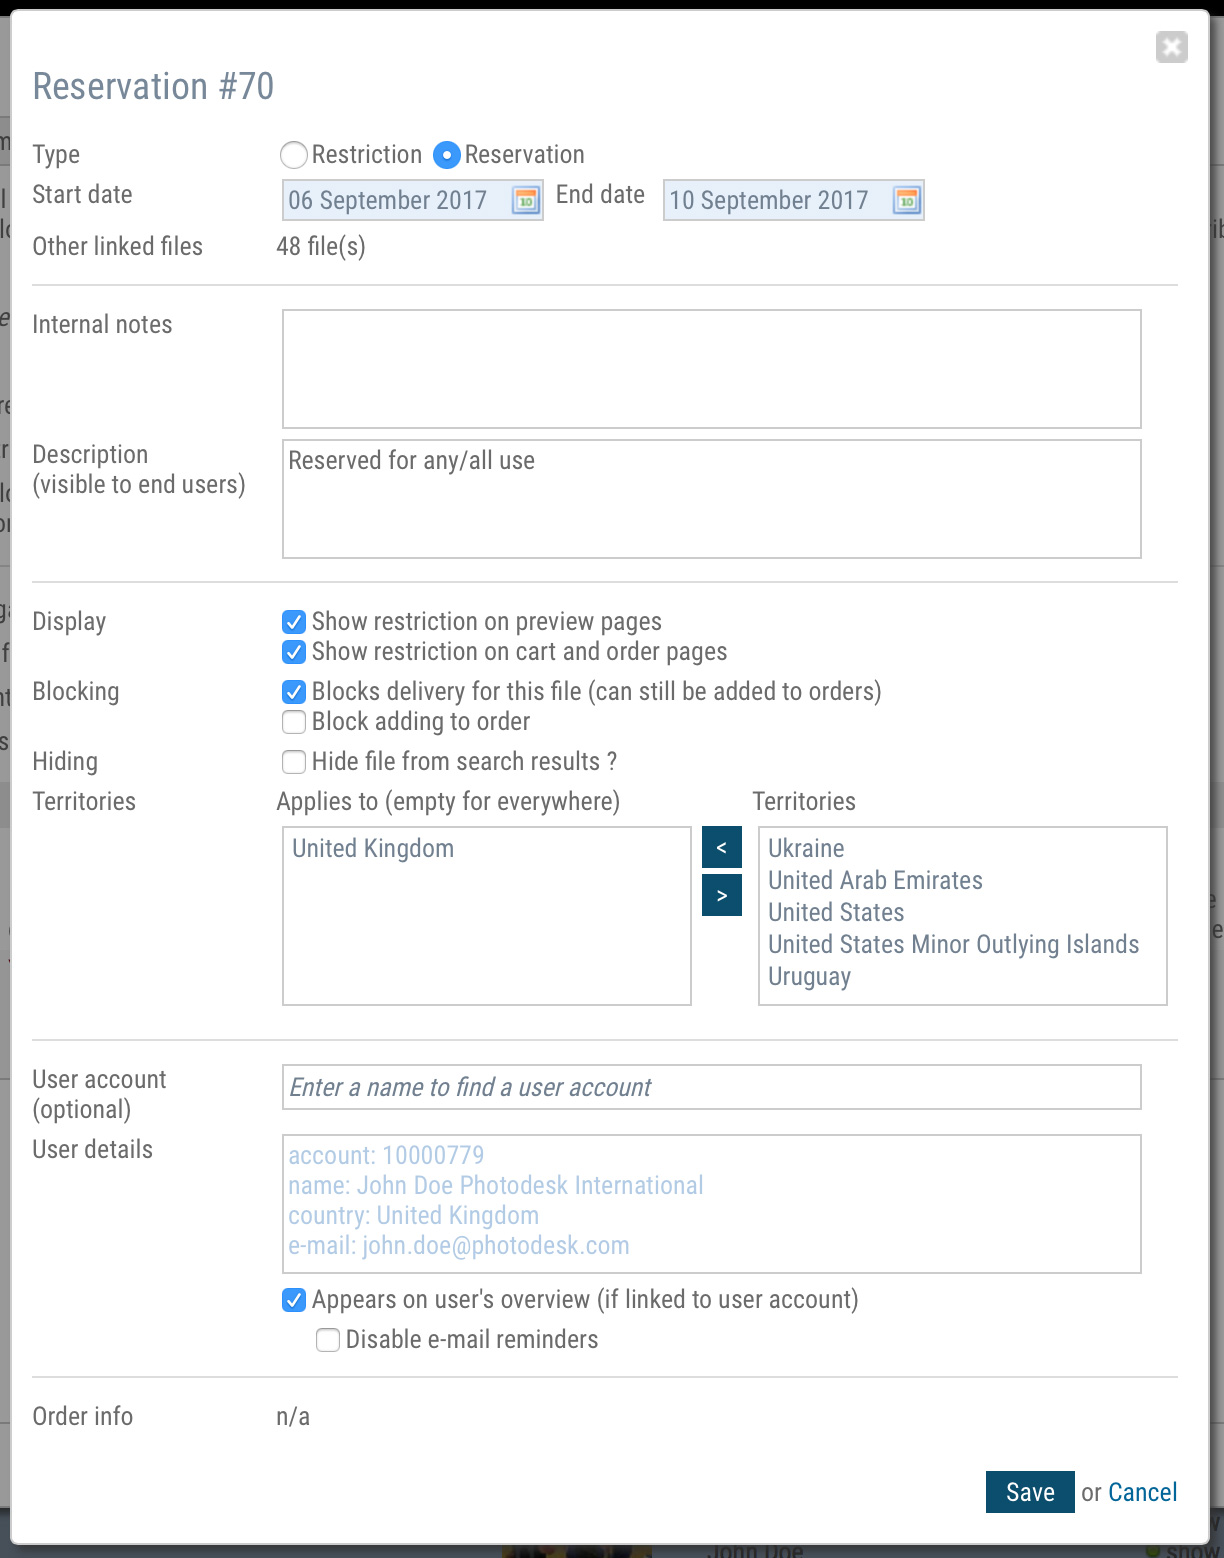
The properties dialog lets you select a user account and it lets you select countries and specific settings.
How to create a restriction or reservation
To create a restriction or reservation, open the file’s data dialog. You can either do this for instance,
- by finding the file on the client facing pages and then click the “File” button in the admin toolbar on a preview page,
- by clicking the File properties link underneath the thumbnail on the order pages,
- by clicking a thumbnail when you are viewing files in a user’s lightboxes, cart, or orders.
In the dialog, click the Restrictions tab where you’ll get an overview of any active restrictions. To create a new one, click the Add restriction link to open a new dialog (screen shot below).
Creating restrictions / reservations on the order pages
You can also create restrictions and/or reservations immediately on the order management pages. Each order detail shows a link for this purpose. Click on it to display the properties. When you save the order, the restrictions are automatically created or updated.

The above screenshot shows the restrictions tab sheet of the metadata dialog. Note how the example shows a reservation that is linked to multiple files and that it applies to use in United Kingdom only.
Creating restrictions/reservations for multiple files
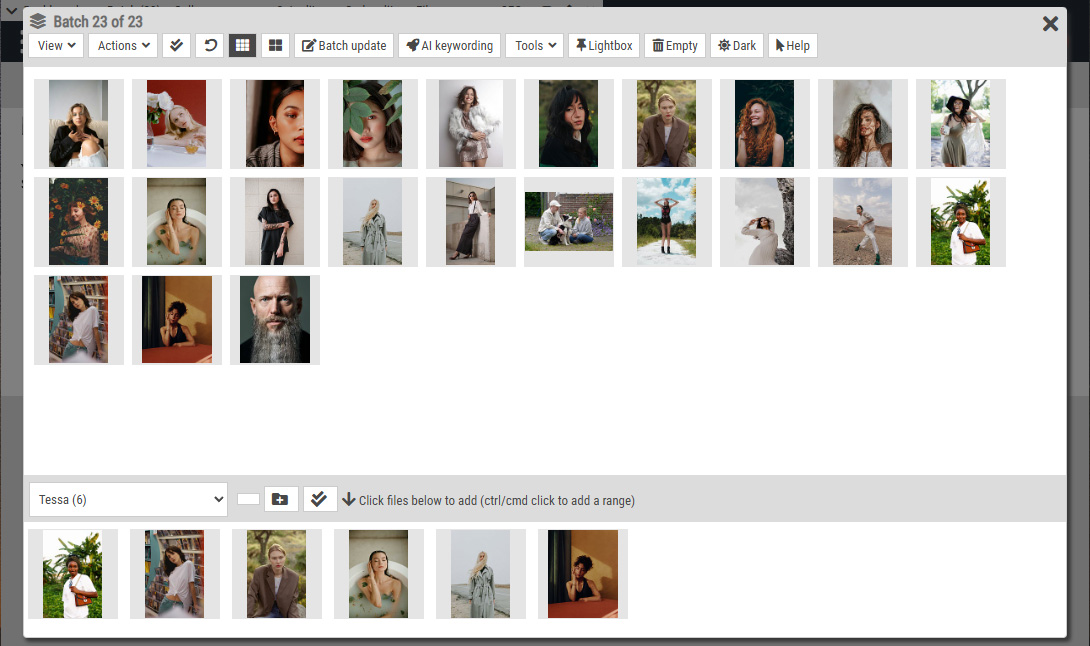
First create a restriction or reservation and save it. It will appear in the overview on the restrictions tab sheet of the file dialog. In the column “Additional files” click on the link to open the additional files dialog. Click on the “Select more files” link which will let you add files from any of your lightboxes. You can also add files by searching for other files using the same dialog. Click on the Save button to attach the files to the restriction.
To remove a file, hover over the thumbnail and then click on the delete button that will appear (see screen shot).
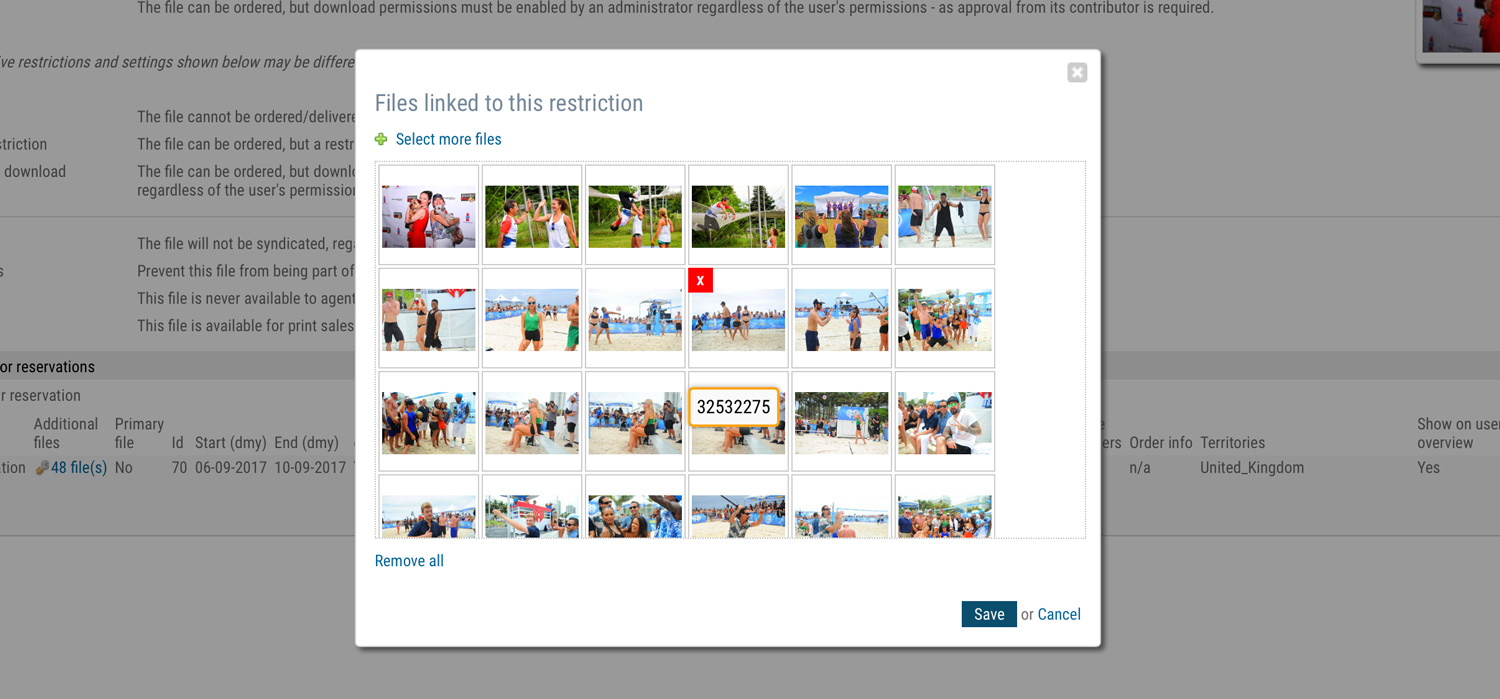
Attaching multiple files to a single reservation or restriction
Displaying restrictions and/or reservations on the client facing pages
You can configure when and where you want restriction and reservation information to appear. You can read more about this in the article Configuring restrictions on supplier files.
User’s restriction and reservation page
If enabled, a page is available to your clients on which they can see which files have restrictions and/or are reserved for them. This includes information about when reservations will expire or have recently expired. To enable this page, you’ll have to activate it via Site configuration, Pages and menu and then click the section Website menu. Tick the checkbox next to Reservations under the My account sub-menu item. Note that you can still use the restriction and reservation system without enabling the client facing page.
Website notifications
With the notification system enabled, the user will be warned about restrictions and/or reservations that are about to expire and that have recently expired. The parameters for how this works can be configured to you liking via Site configuration as described above.
Reminders by e-mail
You can also automatically send reminders by e-mail to let users know that reservations have expired or are about to expire. To enable this function, go to Site configuration, E-mail configuration and check “Reservation reminders”. You can configure when to start and stop sending reminders. There are different e-mail templates for this function.
- Restrictionreminder.txt for single file restrictions
- Restrictionreminders.txt for multiple restrictions for the same user, or a single restriction but linked to more than one file.
- Reservationreminder.txt for single file reservations
- Reservaionreminders.txt for multiple reservations for the same user, or a single reservation but linked to more than one file.
You can change the templates via Site configuration, E-mail templates.
Administrator’s view
The user management overview page will show any restrictions or reservation that exist for your user accounts. The order management pages will also show an indication for files for which restrictions/reservations exist. If a user has immediate download permissions but one or files that he/she ordered have blocking restrictions, the user will not be able to download those files until after you – as an administrator – have allowed the user to do so.
For an overview of all restrictions and reservations, click on the menu item in your administrator’s dashboard.