This article describes how you can create a search dialog. This requires you to add script, CSS and the HTML for the dialog.
You can load an example into the code editor to use as a starting point.
Before you begin
You need to understand how the XS tags work and you need to know Script, CSS and HTML coding. If you don’t, then you can of course contract us or a third party to do the work for you.
If you want to use the standard filters and/or custom filters, then configure these first. You can find this here: Site configuration > Search settings > Search filters and Custom filters. You can only use filters in your search dialog that are enabled in back office.
Adding the HTML for your dialog
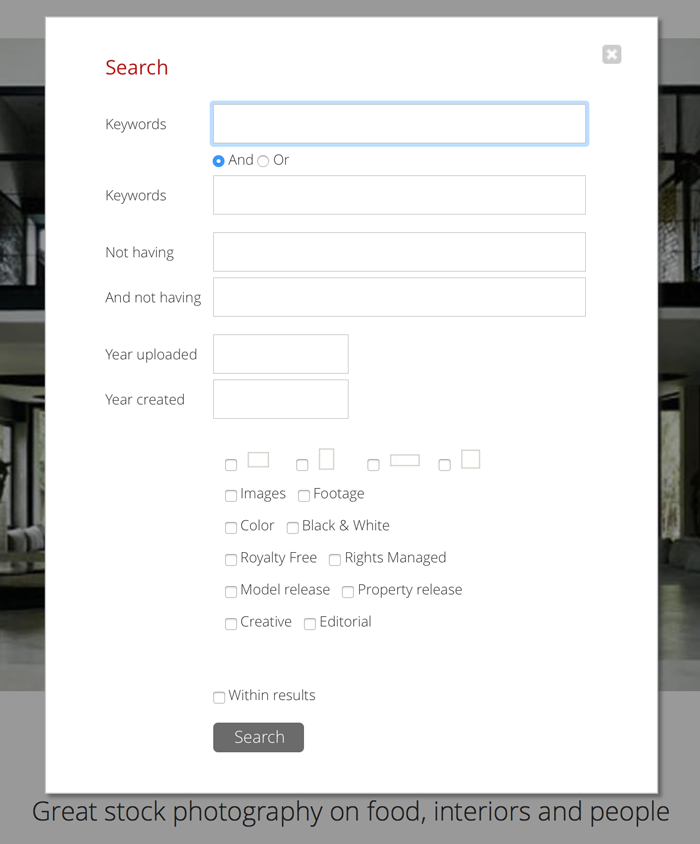
In the code editor, select Page fragments > Search dialog in the dropdown at the top. Click on “Load example” and select searchdialog-1.txt. Finally click Use code to load the example into the editor. Save the code.
The example has HTML to create a dialog as shown in the above example. You can change it by adding or removing filters, adding more search boxes and so on. The example has filters. Note that you can only use filters that you have configured/enabled in backoffice.
The above lines show how you can add input elements for filters to your dialog, in this case the filter for RF/RM files.
is used to output “checked” if the filter’s current value is selected (i.e. it has the value RM).
To add your custom filters (which you must have configured first) you can simply use e.g.
The first parameter of the tag customfilter is the custom filter index (e.g. 1)
The second parameter can be groupname to output the name of the filter group that you have configured, or filtershtml to output the HTML for your filters in this group.
You can style the dialog by adding CSS which we will do next.
Adding the CSS
Select Style > Custom CSS in the dropdown box to load your CSS into the editor.
Our example uses the following CSS:
Copy the above CSS and paste into the editor so that our example will look like the example screen shot. The CSS has classes (among other things) to style the input elements. You can of course remove any CSS you don’t need or change it as required. When you are done you can save your changes.
Adding the Javascript to display the dialog and to search
Select Script > Client script in the drop down and click on the Load example button. Load the client-searchdialog-1.txt example into the editor. Note that this will replace the current script so if you have made other changes already, then copy those into a text editor first so that you can merge your previous changes back in later.
In the init function of the client object, you’ll see the code below – which looks for a button or link with the id “xssearchdialog” and if it exists, it will attach a click handler to it. This allows you to add a search button (that will open the dialog) to your menu or anywhere on the page. If you need more info about the client.js object then read this first: adding Javascript to your pages.
The code below shows the init function of the xssearchdialog Javascript object. Note that we have used the name xssearchdialog for this example, but it can of course be anything you want.
The above function checks to see if the dialog HTML is already loaded and if not, it uses an Ajax call to load the HTML and it then appends it to the page body. It won’t display at this point because the container dialog (#searchdialog) is set to display:none in your CSS.
The showdialog function (below) will take care of positioning and displaying the dialog. It also initialises the buttons/links by attaching click handlers.
The following code shows the object’s search function. It first gets the values that were entered for the 4 search boxes with leading and trailing spaces removed. If there’s no value in the first search box, then the first search input will receive focus again to indicate something must be entered. If the second search input has a value, then the two will be combined with either AND or OR – depending of the value of the radio button with name “sdandor1”. In our example, input boxes 3 and 4 are used for NOT. For example, if input 1 has woman, input 2 has girl, input 3 has portrait and input 4 has studio – then the search query will look something like “(woman or girl) and not portrait and not studio”. You can of course change this to meet your specific requirements.
The code shows the entire search function and how it uses XS script functions to normalise the input, to get filters and to create the URL for the search query.
infradoxsearch.normalizesearch() is used for basic error checking of the resulting search query. The resulting string also has any %20 (space) replace by the + character. Search URL’s require a + in place of a space.
So e.g. (woman or girl) and walking converts to (woman+or+girl)+and+walking
ifilters.getfilters() is a built-in function to get the parameters and values for any of the filters that you have added to your search dialog. Note that search filters are not part of the URL but stored in cookies. The web server reads the cookies and applies the filters based on what’s stored. Hence the line:
document.cookie=”vrs=”+tools.getcookiepart(f);
where f is the filter parameters/values string that was retrieved by calling:
var f=ifilters.getfilters(“searchdialog”);
The parameter for this function is the id of the container element, in this case “searchdialog”.
For the ifilters.getfilters function to work, the input elements in your dialog HTML must have the correct properties and classes. E.g. the property fcode and the class orientationgroup – which you’ll see in the example HTML.
If you have added a checkbox for refine search (search within results) then the line:
var within=dlg.find(“input[name=sdsearchwithin]”).prop(“checked”);
will set the variable within to either true (ticked) or false.
To search within results, the URL /refine?s= is used instead of the URL /search?s=
The JSON object searchprops has information about the last executed search. It has a property called props which in turn has information that we need to create the correct search URL. If you want to see what properties the object has then you can add an alert to your script like this:
which you must of course remove when you’re done.
If the user wants to search within results and the last search was not a search but a “contributor browse” command, then a different URL must be created as you can see in the last part of the search function code.